 |
| 
| | 
| | 
| | 
| | 
| | 
| |
| | | | | |
|
| 
| | 
| | 
| | 
| | 
| | 
| |
| | | | | |
|
| 
| | 
| | 
| | 
| | 
| | 
| |
| | | | | |
|
| 
| | 
| | 
| | 
| | 
| | 
| |
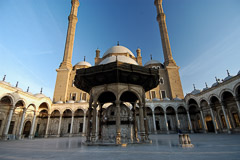
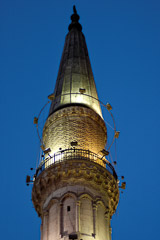
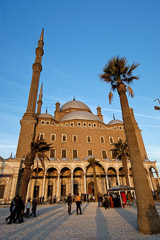
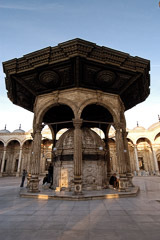
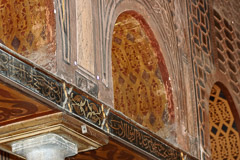
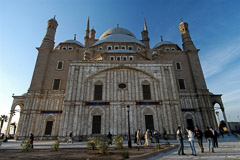
| | | | | Great-Mosque-of-Mohammed-Ali-Cairo-Egypt-1926
From: Cairo |
|
|
| 
| | 
| | 
| | 
| | 
| | 
| |
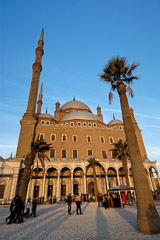
Great-Mosque-of-Mohammed-Ali-Cairo-Egypt-1943
From: Cairo |
| | Great-Mosque-of-Mohammed-Ali-Cairo-Egypt-1943-E
From: Cairo |
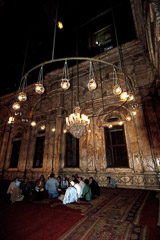
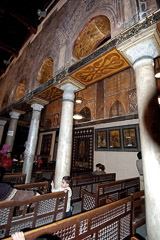
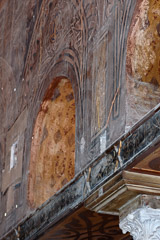
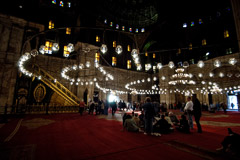
| Interior-Great-Mosque-of-Mohammed-Ali-Cairo-Egypt-1892
From: Cairo |
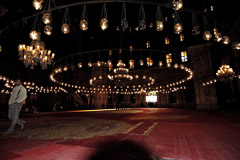
| Interior-Great-Mosque-of-Mohammed-Ali-Cairo-Egypt-1902
From: Cairo |
| Interior-Great-Mosque-of-Mohammed-Ali-Cairo-Egypt-1908a
From: Cairo |
|
|
| 
| | 
| | 
| | 
| | 
| | 
| |
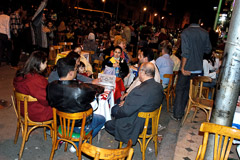
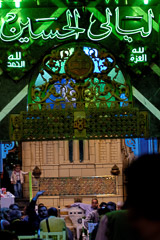
nightlife-downtown-cairo-egypt-1968
From: Cairo |
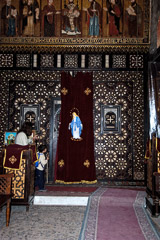
| | | | | Interior-Hanging-Church-Coptic-Cairo-Photo-1827
From: Cairo |
|
|
| 
| | 
| | 
| | 
| | 
| | 
| |
Interior-Hanging-Church-Coptic-Cairo-Photo-1832
From: Cairo |
| Great-Mosque-of-Mohammed-Ali-Cairo-Egypt-1947
From: Cairo |
| Great-Mosque-of-Mohammed-Ali-Cairo-Egypt-1950-E
From: Cairo |
| Great-Mosque-of-Mohammed-Ali-Cairo-Egypt-1950
From: Cairo |
| Great-Mosque-of-Mohammed-Ali-Cairo-Egypt-1950EE
From: Cairo |
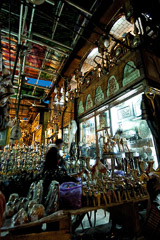
| market-old-cairo-egypt-1953
From: Cairo |
|
|
| 
| | 
| | 
| | 
| | 
| | 
| |
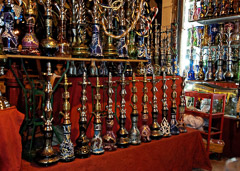
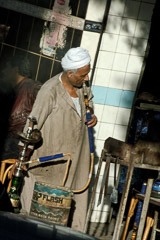
Water-pipes-for-sale-cairo-egypt-1966
From: Cairo |
| | | Great-Mosque-of-Mohammed-Ali-Cairo-Egypt-1916
From: Cairo |
| Great-Mosque-of-Mohammed-Ali-Cairo-Egypt-1947-E
From: Cairo |
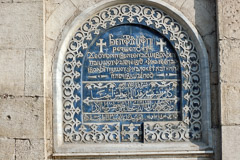
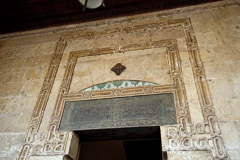
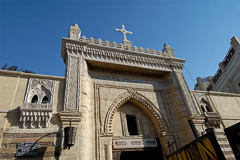
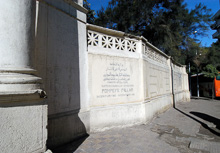
| Inscription-outside-the-Hanging-Church-5488
From: Cairo |
|
|
| 
| | 
| | 
| | 
| | 
| | 
| |
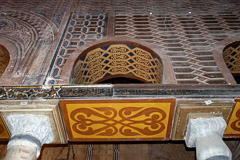
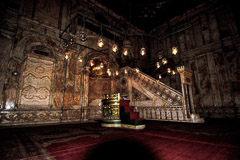
Interior-Great-Mosque-of-Mohammed-Ali-Cairo-Egypt-1908
From: Cairo |
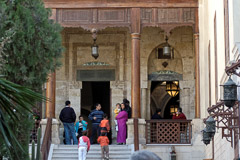
| | | | | Hanging-Church-Coptic-Cairo-Egypt5451
From: Cairo |
|
|
| 
| | 
| | 
| | 
| | 
| | 
| |
Hanging-Church-Coptic-Cairo-Egypt5452
From: Cairo |
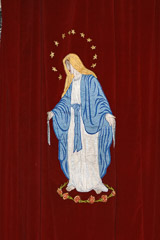
| | Egyptian-Christian-God-Church-5477
From: Cairo |
| Interior-Hanging-Church-Coptic-Cairo-Egypt-Photo5471
From: Cairo |
| Interior-Hanging-Church-Coptic-Cairo-Egypt-Photo5472
From: Cairo |
| Interior-Hanging-Church-Coptic-Cairo-Egypt-Photo5473
From: Cairo |
|
|
| 
| | 
| | 
| | 
| | 
| | 
| |
Interior-Hanging-Church-Coptic-Cairo-Egypt-Photo5476
From: Cairo |
| | | | Great-Mosque-of-Mohammed-Ali-Cairo-Egyp-1884
From: Cairo |
| Interior-Great-Mosque-of-Mohammed-Ali-Cairo-Egypt-1885
From: Cairo |
|
|
| 
| | 
| | 
| | 
| | 
| | 
| |
Interior-Hanging-Church-Coptic-Cairo-Photo-1830
From: Cairo |
| | Great-Mosque-of-Mohammed-Ali-Cairo-Egypt-1913-E
From: Cairo |
| Great-Mosque-of-Mohammed-Ali-Cairo-Egypt-1913-EE
From: Cairo |
| Great-Mosque-of-Mohammed-Ali-Cairo-Egypt-1913
From: Cairo |
| Great-Mosque-of-Mohammed-Ali-Cairo-Egypt-1913EEE
From: Cairo |
|
|
| 
| | 
| | 
| | 
| | 
| | 
| |
Interior-Hanging-Church-Coptic-Cairo-Photo-1838
From: Cairo |
| | Hanging-Church-Coptic-Cairo-Egypt5457
From: Cairo |
| Interior-Great-Mosque-of-Mohammed-Ali-Cairo-Egypt-1893
From: Cairo |
| Interior-Hanging-Church-Coptic-Cairo-Photo-1810
From: Cairo |
| Interior-Hanging-Church-Coptic-Cairo-Photo-1812
From: Cairo |
|
|
| 
| | 
| | 
| | 
| | 
| | 
| |
Interior-Hanging-Church-Coptic-Cairo-Photo-1814
From: Cairo |
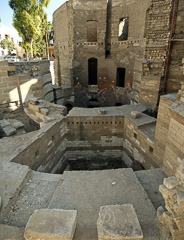
| | Exterior-Hanging-Church,-Coptic-Cairo-Photo-1794
From: Cairo |
| Exterior-Hanging-Church,-Coptic-Cairo-Photo-1795
From: Cairo |
| Hanging-Church-Coptic-Cairo-Egypt5455
From: Cairo |
| |
|
| 
| | 
| | 
| | 
| | 
| | 
| |
| | | | | |
|
| 
| | 
| | 
| | 
| | 
| | 
| |
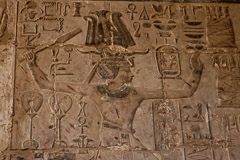
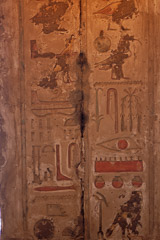
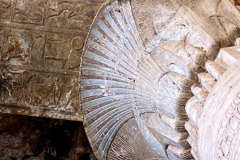
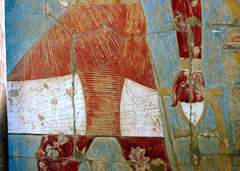
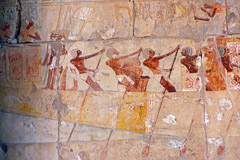
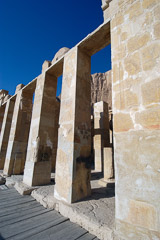
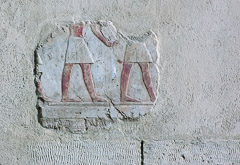
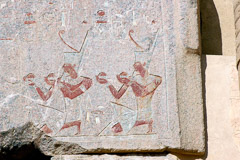
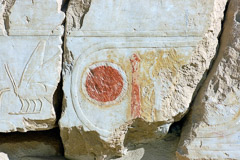
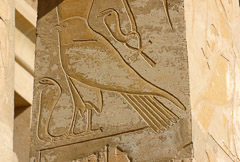
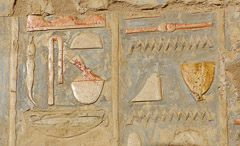
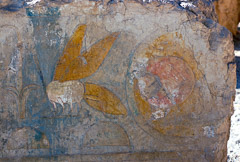
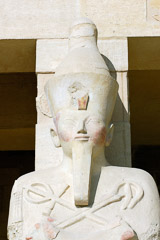
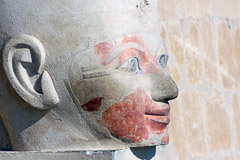
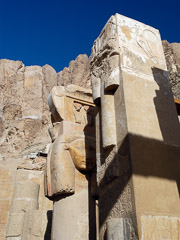
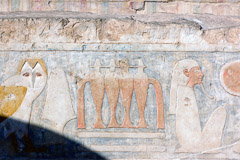
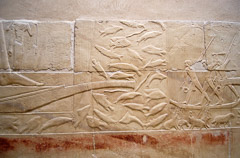
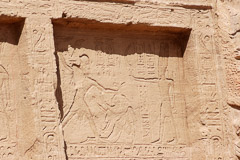
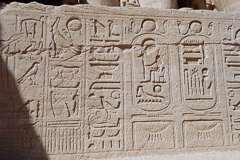
| painted-bas-relief-hieroglyphics-temple-of-queen-hatshepsut-luxor-egypt-photo_5703a
From: Valley of the Queen |
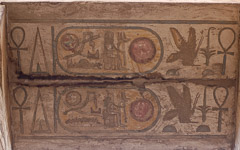
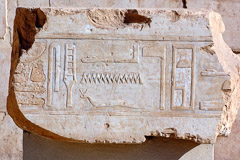
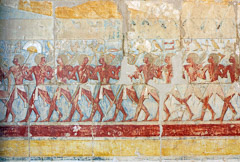
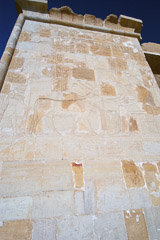
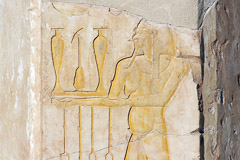
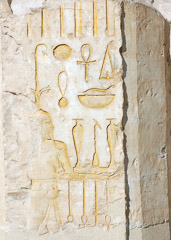
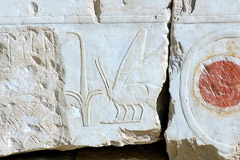
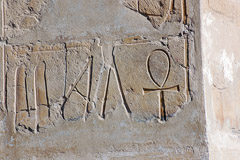
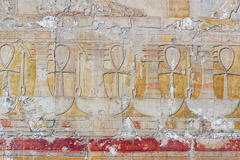
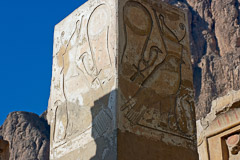
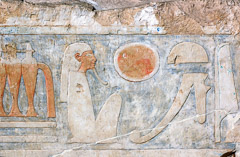
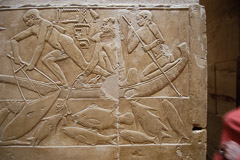
| painted-bas-relief-hieroglyphics-temple-of-queen-hatshepsut-luxor-egypt-photo_5782
From: Valley of the Queen |
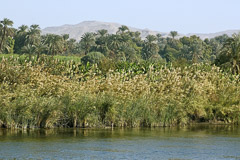
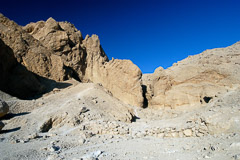
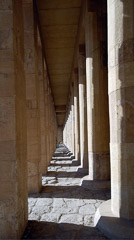
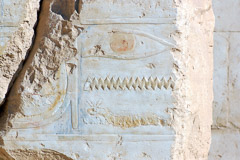
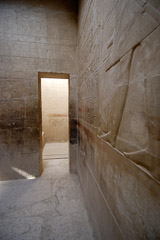
| philae-egypt-6640E
From: Egypt |
| | |
|
| 
| | 
| | 
| | 
| | 
| | 
| |
| | | | | |
|
| 
| | 
| | 
| | 
| | 
| | 
| |
| | | | | |
|
| 
| | 
| | 
| | 
| | 
| | 
| |
| | | | | |
|
| 
| | 
| | 
| | 
| | 
| | 
| |
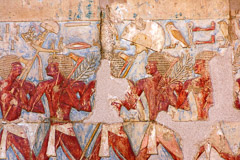
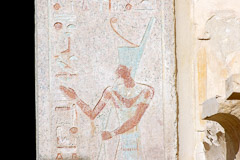
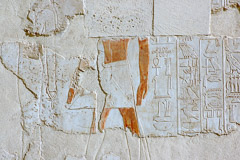
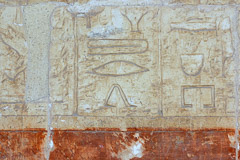
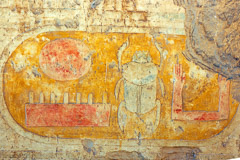
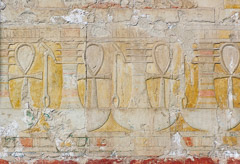
| | | | painted-bas-relief-hieroglyphics-temple-of-queen-hatshepsut-luxor-egypt-photo_5795a
From: Valley of the Queen |
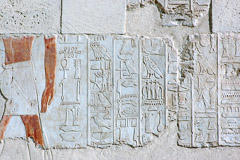
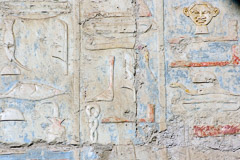
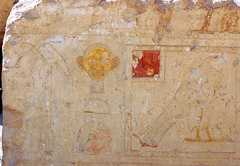
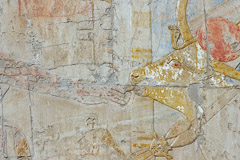
| painted-bas-relief-hieroglyphics-temple-of-queen-hatshepsut-luxor-egypt-photo_5799
From: Valley of the Queen |
|
|
| 
| | 
| | 
| | 
| | 
| | 
| |
painted-bas-relief-hieroglyphics-temple-of-queen-hatshepsut-luxor-egypt-photo_5803
From: Valley of the Queen |
| painted-bas-relief-hieroglyphics-temple-of-queen-hatshepsut-luxor-egypt-photo_5804
From: Valley of the Queen |
| painted-bas-relief-hieroglyphics-temple-of-queen-hatshepsut-luxor-egypt-photo_5810a
From: Valley of the Queen |
| | painted-bas-relief-hieroglyphics-temple-of-queen-hatshepsut-luxor-egypt-photo_5785
From: Valley of the Queen |
| painted-bas-relief-hieroglyphics-temple-of-queen-hatshepsut-luxor-egypt-photo_5787
From: Valley of the Queen |
|
|
| 
| | 
| | 
| | 
| | 
| | 
| |
painted-bas-relief-hieroglyphics-temple-of-queen-hatshepsut-luxor-egypt-photo_5788a
From: Valley of the Queen |
| painted-bas-relief-hieroglyphics-temple-of-queen-hatshepsut-luxor-egypt-photo_5791
From: Valley of the Queen |
| painted-bas-relief-hieroglyphics-temple-of-queen-hatshepsut-luxor-egypt-photo_5794
From: Valley of the Queen |
| painted-bas-relief-hieroglyphics-temple-of-queen-hatshepsut-luxor-egypt-photo_5705
From: Valley of the Queen |
| painted-bas-relief-hieroglyphics-temple-of-queen-hatshepsut-luxor-egypt-photo_5706a
From: Valley of the Queen |
| painted-bas-relief-hieroglyphics-temple-of-queen-hatshepsut-luxor-egypt-photo_5707
From: Valley of the Queen |
|
|
| 
| | 
| | 
| | 
| | 
| | 
| |
painted-bas-relief-hieroglyphics-temple-of-queen-hatshepsut-luxor-egypt-photo_5755
From: Valley of the Queen |
| painted-bas-relief-hieroglyphics-temple-of-queen-hatshepsut-luxor-egypt-photo_5761
From: Valley of the Queen |
| painted-bas-relief-hieroglyphics-temple-of-queen-hatshepsut-luxor-egypt-photo_5689
From: Valley of the Queen |
| painted-bas-relief-hieroglyphics-temple-of-queen-hatshepsut-luxor-egypt-photo_5691a
From: Valley of the Queen |
| painted-bas-relief-hieroglyphics-temple-of-queen-hatshepsut-luxor-egypt-photo_5693
From: Valley of the Queen |
| painted-bas-relief-hieroglyphics-temple-of-queen-hatshepsut-luxor-egypt-photo_5668
From: Valley of the Queen |
|
|
| 
| | 
| | 
| | 
| | 
| | 
| |
painted-bas-relief-hieroglyphics-temple-of-queen-hatshepsut-luxor-egypt-photo_5671a
From: Valley of the Queen |
| painted-bas-relief-hieroglyphics-temple-of-queen-hatshepsut-luxor-egypt-photo_5673a
From: Valley of the Queen |
| painted-bas-relief-hieroglyphics-temple-of-queen-hatshepsut-luxor-egypt-photo_5679a
From: Valley of the Queen |
| painted-bas-relief-hieroglyphics-temple-of-queen-hatshepsut-luxor-egypt-photo_5686a
From: Valley of the Queen |
| painted-bas-relief-hieroglyphics-temple-of-queen-hatshepsut-luxor-egypt-photo_5687a
From: Valley of the Queen |
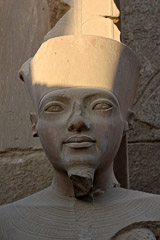
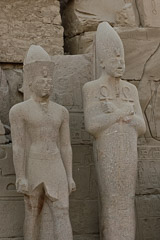
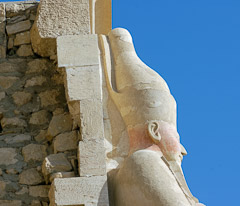
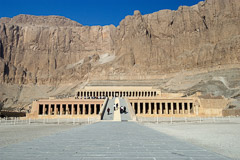
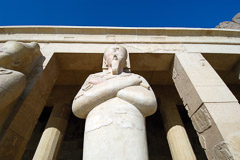
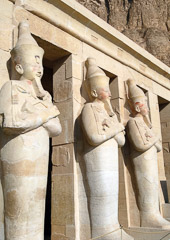
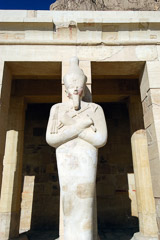
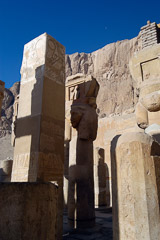
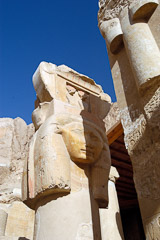
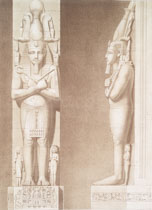
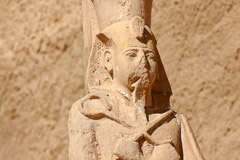
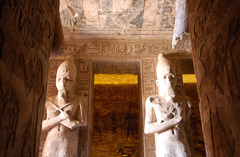
| osirid-statues-on-pillars-entrance-hatshepsut-temple-photo-image_2125a
From: Valley of the Queen |
|
|
| 
| | 
| | 
| | 
| | 
| | 
| |
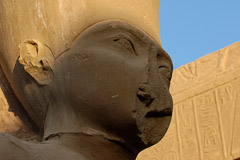
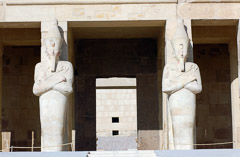
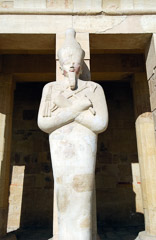
| osirid-statues-on-pillars-entrance-hatshepsut-temple-photo-image_5744a
From: Valley of the Queen |
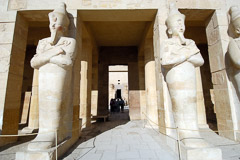
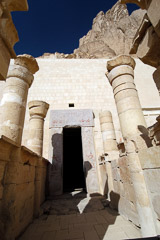
| | | | osirid-statues-on-pillars-entrance-hatshepsut-temple-photo-image_2116a
From: Valley of the Queen |
|
|
| 
| | 
| | 
| | 
| | 
| | 
| |
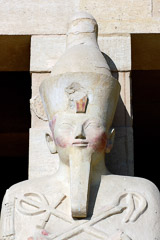
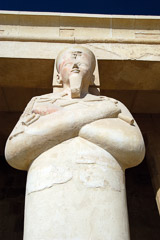
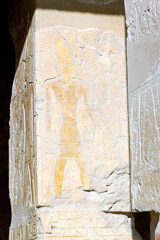
osirid-statues-on-pillars-entrance-hatshepsut-temple-photo-image_2119a
From: Valley of the Queen |
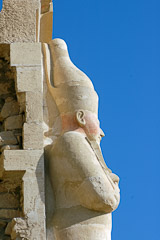
| osirid-statues-on-pillars-entrance-hatshepsut-temple-photo-image_2122a
From: Valley of the Queen |
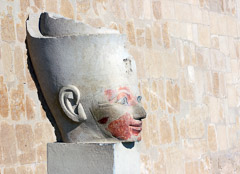
| osirid-statues-on-pillars-entrance-hatshepsut-temple-photo-image_2122b
From: Valley of the Queen |
| osirid-statues-on-pillars-entrance-hatshepsut-temple-photo-image_2123a
From: Valley of the Queen |
| | |
|
| 
| | 
| | 
| | 
| | 
| | 
| |
| | | | | |
|
| 
| | 
| | 
| | 
| | 
| | 
| |
| | | | | |
|
| 
| | 
| | 
| | 
| | 
| | 
| |
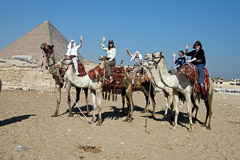
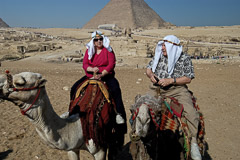
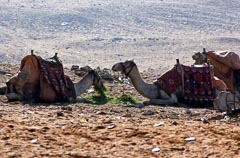
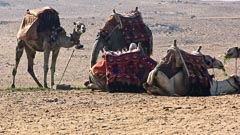
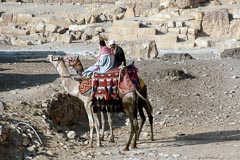
group-of-camels-near-pyramids-giza-egypt-photo_5375-ga
From: Giza |
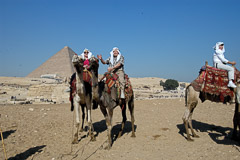
| group-of-camels-near-pyramids-giza-egypt-photo_5375
From: Giza |
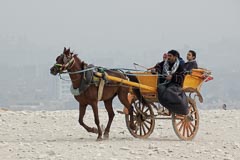
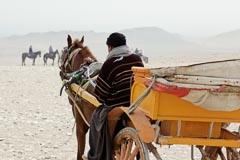
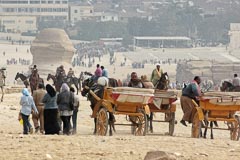
| horse-and-cart-near-great-pyramids-photo_6895
From: Giza |
| horse-and-cart-near-great-pyramids-photo_6896
From: Giza |
| horse-and-cart-near-great-pyramids-photo_6897
From: Giza |
| horse-and-cart-near-great-pyramids-photo_6902
From: Giza |
|
|
| 
| | 
| | 
| | 
| | 
| | 
| |
riding-donkey-near-pyramids-giza-egypt-photo_5407
From: Giza |
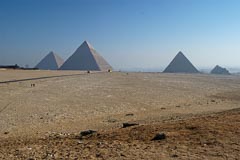
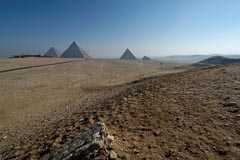
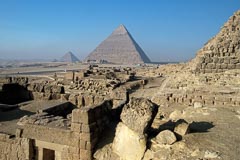
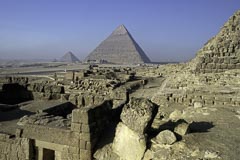
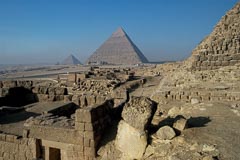
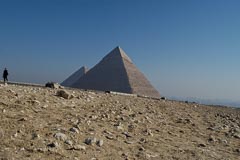
| great-pyramids-giza-egypt-photo1724
From: Giza |
| great-pyramids-giza-egypt-photo1726
From: Giza |
| great-pyramids-giza-egypt-photo1731
From: Giza |
| great-pyramids-giza-egypt-photo3811
From: Giza |
| great-pyramids-giza-egypt-photo3816
From: Giza |
|
|
| 
| | 
| | 
| | 
| | 
| | 
| |
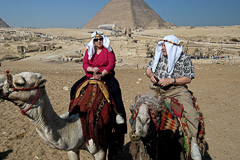
group-of-camels-near-pyramids-giza-egypt-photo_5361
From: Giza |
| group-of-camels-near-pyramids-giza-egypt-photo_5363-ga
From: Giza |
| great-pyramids-giza-egypt-photo1651-2015-2
From: Giza |
| great-pyramids-giza-egypt-photo1651-2015-3
From: Giza |
| great-pyramids-giza-egypt-photo1651
From: Giza |
| great-pyramids-giza-egypt-photo1660
From: Giza |
|
|
| 
| | 
| | 
| | 
| | 
| | 
| |
great-pyramids-giza-egypt-photo1681
From: Giza |
| great-pyramids-giza-egypt-photo1723
From: Giza |
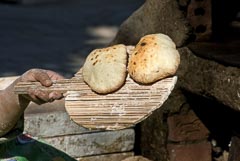
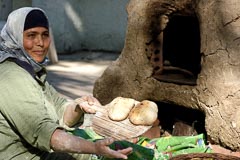
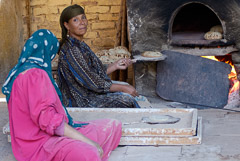
| egyptian-women-making-fresh-bread_5432-ga-edit
From: Giza |
| egyptian-women-making-fresh-bread_5432-ga
From: Giza |
| egyptian-women-making-fresh-bread_5438
From: Giza |
| great-pyramids-giza-egypt-photo_1741
From: Giza |
|
|
| 
| | 
| | 
| | 
| | 
| | 
| |
great-pyramids-giza-egypt-photo_1743
From: Giza |
| great-pyramids-giza-egypt-photo_3803
From: Giza |
| close-up-of-sphinx-giza-egypt-photo_5397
From: Giza |
| close-up-of-sphinx-giza-egypt-photo_5399
From: Giza |
| close-up-of-sphinx-giza-egypt-photo_5400
From: Giza |
| close-up-of-sphinx-giza-egypt-photo_5401
From: Giza |
|
|
| 
| | 
| | 
| | 
| | 
| | 
| |
close-up-of-sphinx-giza-egypt-photo_5395
From: Giza |
| closeup-great-pyramids-giza-egypt-photo_5346a
From: Giza |
| closeup-great-pyramids-giza-egypt-photo_5346b
From: Giza |
| closeup-great-pyramids-giza-egypt-photo_5347
From: Giza |
| closeup-great-pyramids-giza-egypt-photo_5347a
From: Giza |
| closeup-great-pyramids-giza-egypt-photo_5347b
From: Giza |
|
|
| 
| | 
| | 
| | 
| | 
| | 
| |
TN_closeup-great-pyramids-giza-egypt-photo_1708
From: Giza |
| TN_closeup-great-pyramids-giza-egypt-photo_1712
From: Giza |
| closeup-great-pyramids-giza-egypt-photo_1715
From: Giza |
| closeup-great-pyramids-giza-egypt-photo_5345
From: Giza |
| closeup-great-pyramids-giza-egypt-photo_5345a
From: Giza |
| closeup-great-pyramids-giza-egypt-photo_5346
From: Giza |
|
|
| 
| | 
| | 
| | 
| | 
| | 
| |
TN_camels-in-front-of-great-pyramids-photo_5336
From: Giza |
| TN_camels-in-front-of-great-pyramids-photo_5336a
From: Giza |
| TN_camels-in-front-of-great-pyramids-photo_5338
From: Giza |
| TN_camels-in-front-of-great-pyramids-photo_5338a
From: Giza |
| TN_camels-in-front-of-great-pyramids-giza-egypt-photo1662
From: Giza |
| TN_camels-in-front-of-great-pyramids-giza-egypt-photo1666
From: Giza |
|
|
| 
| | 
| | 
| | 
| | 
| | 
| |
TN_camels-in-front-of-great-pyramids-giza-egypt-photo1672
From: Giza |
| TN_camels-in-front-of-great-pyramids-giza-egypt-photo1675
From: Giza |
| TN_camels-in-front-of-great-pyramids-giza-egypt-photo1676
From: Giza |
| TN_camels-in-front-of-great-pyramids-photo_3798
From: Giza |
| Sphinx-with-Pyramid-of-Khu_5390
From: Egypt |
| |
|
| 
| | 
| | 
| | 
| | 
| | 
| |
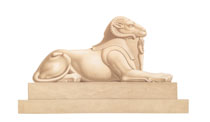
| | | | ancient-egypt-large-sculpture-with-ram-2
From: Statues |
| ancient-egypt-large-sculpture-with-ram
From: Statues |
|
|
| 
| | 
| | 
| | 
| | 
| | 
| |
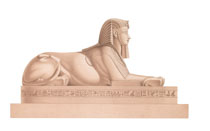
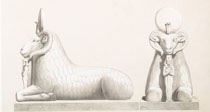
Temple-de-Mauth-et-Khons
From: Statues |
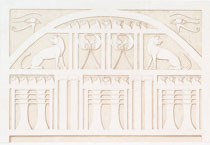
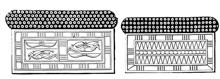
| ancient-egypt-architecture-interior-door-crowns-3
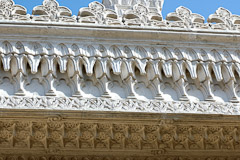
From: Architecture |
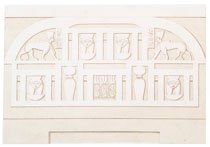
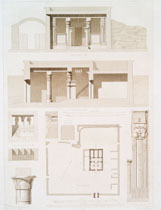
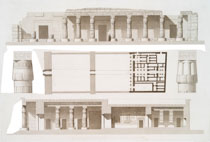
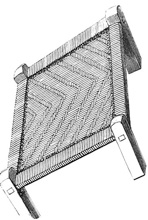
| Architecture-Temple-of-Deyr-el-Medinehmap-cuts-and-details
From: Architecture |
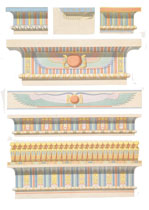
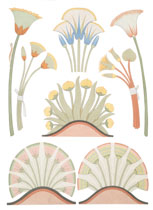
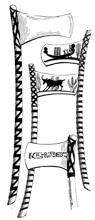
| ancient-egypt-architecture-decoration-of-cornices
From: Architecture |
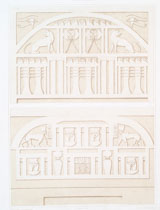
| ancient-egypt-architecture-interior-door-crowns-1
From: Architecture |
| ancient-egypt-architecture-interior-door-crowns-2
From: Architecture |
|
|
| 
| | 
| | 
| | 
| | 
| | 
| |
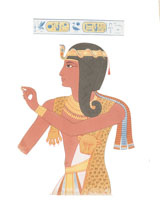
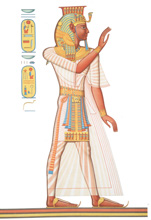
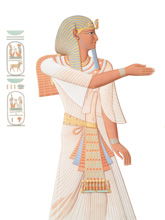
| portrait-of-prince-montuherkhepshef-son-of-ramesses-IX
From: Ancient Egypt |
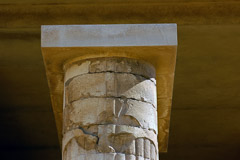
| | TN_column-of-ramesseum-bundles-of--papyrus-stalks-or
From: Ancient Egypt |
| | |
|
| 
| | 
| | 
| | 
| | 
| | 
| |
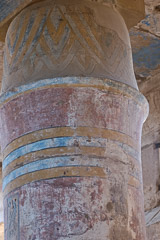
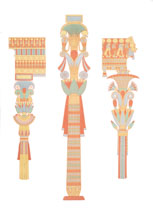
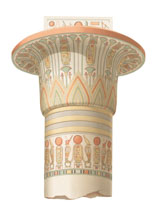
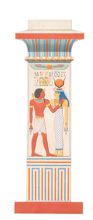
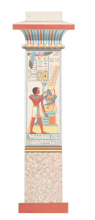
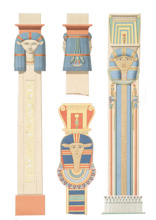
| ancient-egypt-architecture-decorative-pillars-thebes
From: Ancient Egypt |
| | | | ancient-egypt-architecture-pillars-with-hieroglyphics-at-thebes
From: Ancient Egypt |
|
|
| 
| | 
| | 
| | 
| | 
| | 
| |
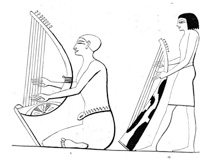
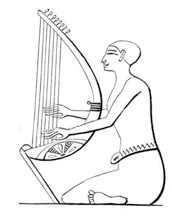
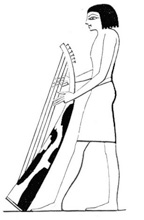
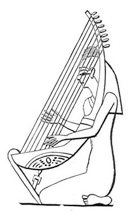
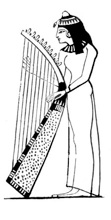
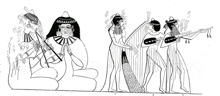
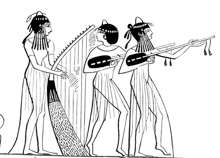
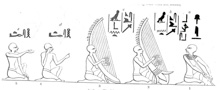
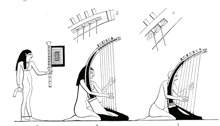
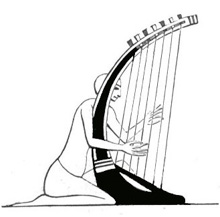
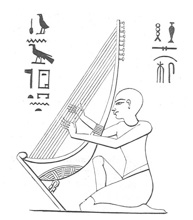
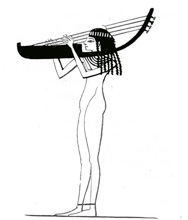
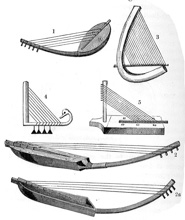
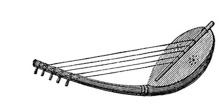
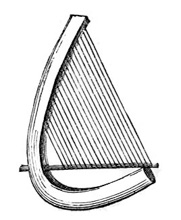
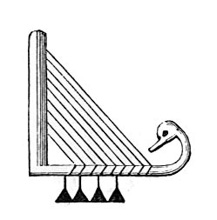
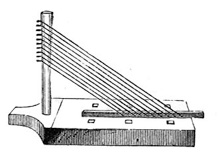
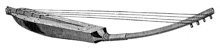
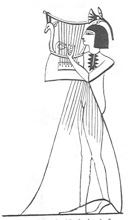
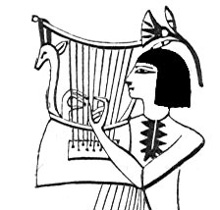
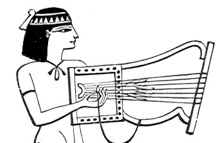
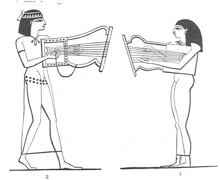
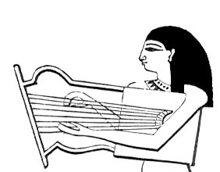
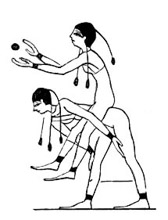
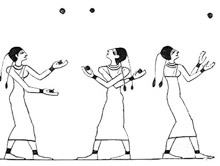
| | | | ancient-egyptian-woman-playing-musical-instrument-clipart
From: Ancient Egypt |
| |
|
| 
| | 
| | 
| | 
| | 
| | 
| |
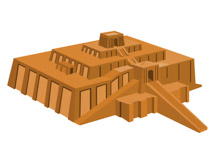
| | ziggurats-giant-pyramid-temples-ancient-mesopotamia-clipart
From: Ancient Egypt |
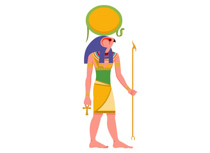
| thoth-the-ancient-egyptian-god-of-scribe-clipart
From: Ancient Egypt |
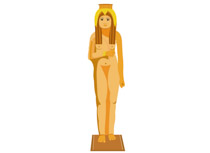
| statuette-of-queen-ahmose-nefertari-ancient-egypt-clipart
From: Ancient Egypt |
| |
|
| 
| | 
| | 
| | 
| | 
| | 
| |
| TN_pano-osirid-statues-entrance-hatshepsut-temple-video
From: Egypt |
| TN_pano-temple-egypt-video
From: Egypt |
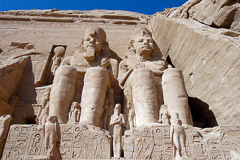
| TN_pano-abusimbel-egypt-video-3513aa
From: Egypt |
| | |
|
| 
| | 
| | 
| | 
| | 
| | 
| |
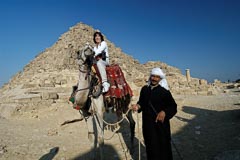
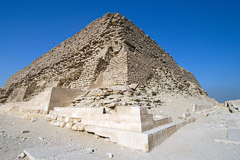
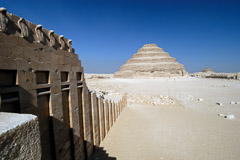
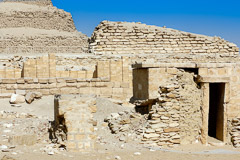
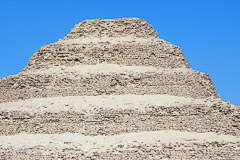
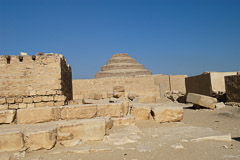
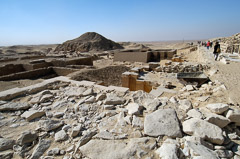
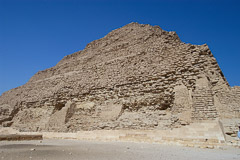
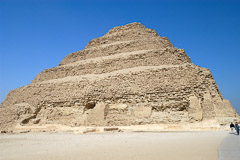
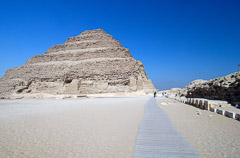
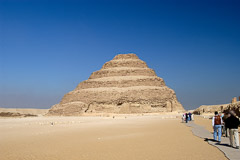
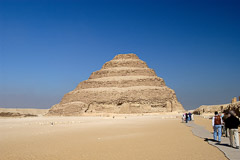
| sakkara-step-pyramid-complex-built-for-king-djoser-photo-image-1310
From: Sakkara |
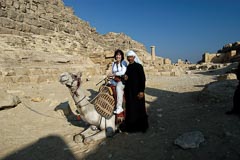
| two-men-near-sakkara-step-pyramid-photo-image-1222
From: Sakkara |
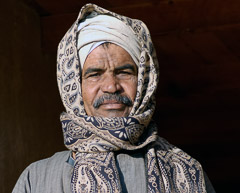
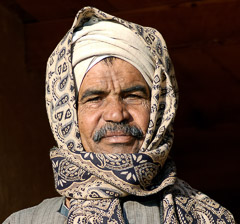
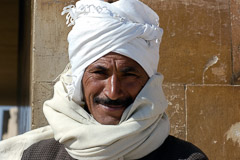
| egyptain-man-wering-white-scarf-over-head-image-4975
From: Sakkara |
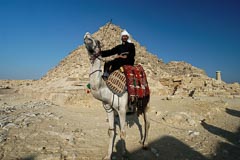
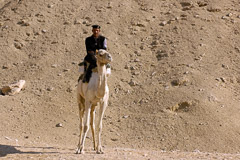
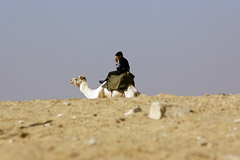
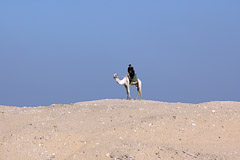
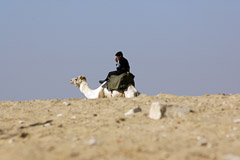
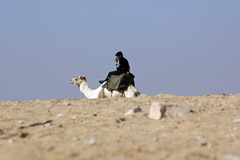
| egyptain-guard-sitting-on-camel-photo-image-4935a
From: Sakkara |
| corner-sakkara-step-pyramid-photo-image-1284
From: Sakkara |
|
|
| 
| | 
| | 
| | 
| | 
| | 
| |
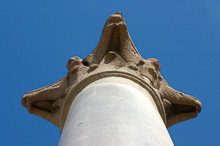
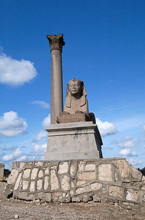
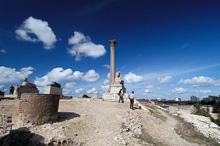
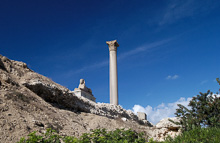
photo-top-of-pompeys-pillar-alexandria-egypt-5158
From: Alexandria |
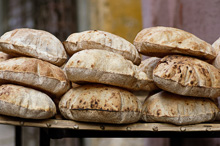
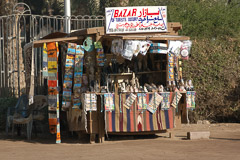
| photo-stack-of-fresh-pita-bread-for-sale-in-egypt-image-5199
From: Alexandria |
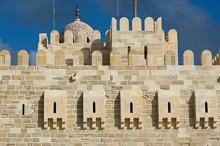
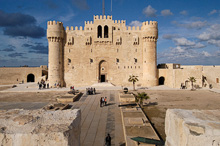
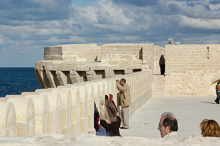
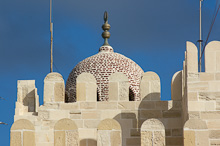
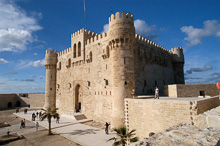
| photo-qaitbay-citadel-fort-alexandria-egypt-image-5265e
From: Alexandria |
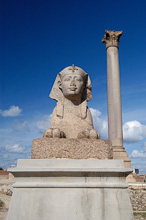
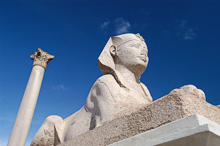
| photo-pompeys-pillar-and-sphinx-alexandria-egypt-image-1418
From: Alexandria |
| photo-qaitbay-citadel-fort-alexandria-egypt-image-1541
From: Alexandria |
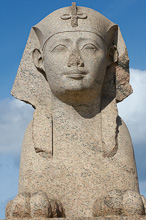
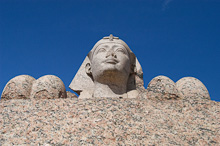
| photo-closeup-sphinx-alexandria-egypt-image-5156-e
From: Alexandria |
|
|
| 
| | 
| | 
| | 
| | 
| | 
| |
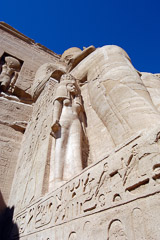
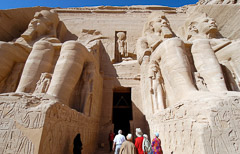
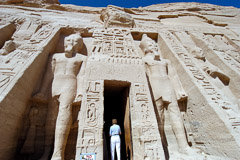
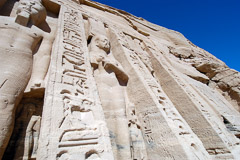
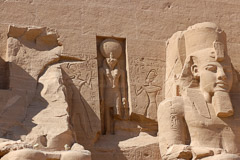
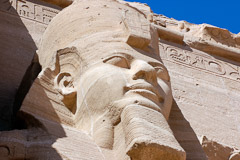
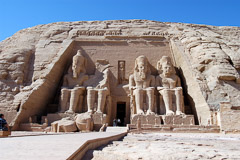
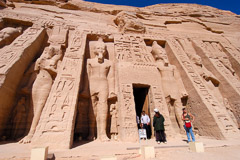
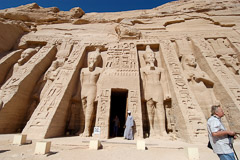
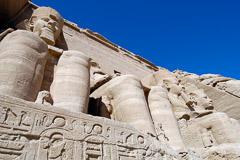
rameses-ii-temple-in-abu-simbel-aswan-egypt-photo-image-3548
From: Abusimbel |
| rameses-ii-temple-in-abu-simbel-aswan-egypt-photo-image-3533
From: Abusimbel |
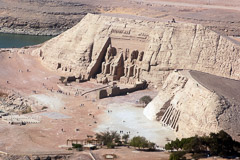
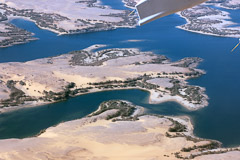
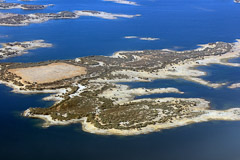
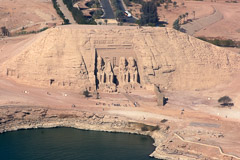
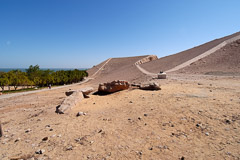
| aerial-view-abu-simbel-aswan-egypt-photo-image-6802
From: Abusimbel |
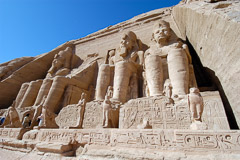
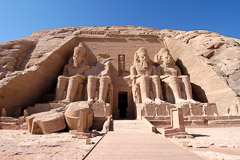
| rameses-ii-temple-in-abu-simbel-aswan-egypt-photo-image-3636
From: Abusimbel |
| rameses-ii-temple-in-abu-simbel-aswan-egypt-photo-image-3528
From: Abusimbel |
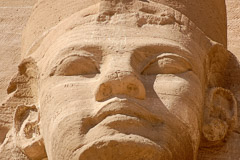
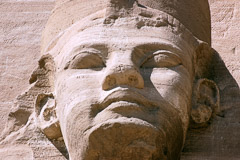
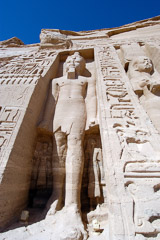
| close-up-of-statue-great-temple-abu-simbel-egypt-photo-image-6810
From: Abusimbel |
|
|
| 
| | 
| | 
| | 
| | 
| | 
| |
rameses-ii-temple-in-abu-simbel-aswan-egypt-photo-image-6817
From: Abusimbel |
| close-up-of-statue-great-temple-abu-simbel-egypt-photo-image-6820
From: Abusimbel |
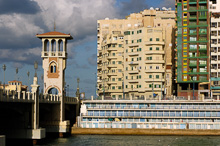
| constant-traffic-of-downtown-alexandria-egypt-5320
From: Alexandria |
| alexandria-egypt-with-modern-building-5304
From: Alexandria |
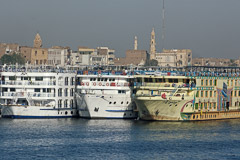
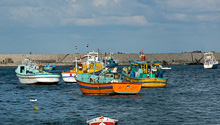
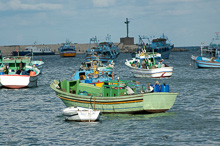
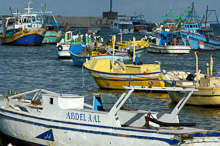
| | photo-boats-in-harbor-alexandria-egypt-5295
From: Alexandria |
|
|
| 
| | 
| | 
| | 
| | 
| | 
| |
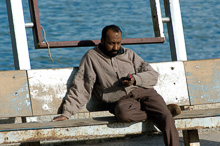
| egyptian-man-sitting-at-harbor-near-citadel-alexandria-egypt-5280
From: Alexandria |
| photo-boats-in-harbor-alexandria-egypt-5279
From: Alexandria |
| photo-boats-in-harbor-alexandria-egypt-5274
From: Alexandria |
| photo-qaitbay-citadel-fort-alexandria-egypt-image-5266
From: Alexandria |
| photo-qaitbay-citadel-fort-alexandria-egypt-image-5261-e
From: Alexandria |
|
|
| 
| | 
| | 
| | 
| | 
| | 
| |
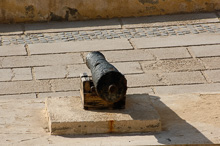
canon-citadel-of-qaitbay-fortres-photo-5253
From: Alexandria |
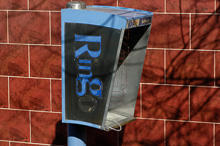
| | photo-telephone-booth-alexandria-egypt-04-5226
From: Alexandria |
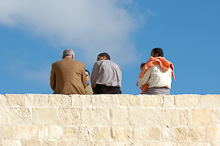
| men-sitting-on-wall-qaitbay-citadel-5251
From: Alexandria |
| photo-stack-of-fresh-pita-bread-for-sale-in-egypt-image-5200
From: Alexandria |
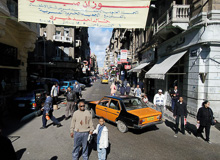
| photo-street-scene-alexandria-egypt-photo-5192
From: Alexandria |
|
|
| 
| | 
| | 
| | 
| | 
| | 
| |
photo-street-scene-alexandria-egypt-photo-5195
From: Alexandria |
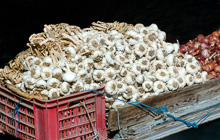
| photo-cart-full-of-fresh-garlic-alexandria-egypt--5183e
From: Alexandria |
| photo-street-scene-alexandria-egypt-photo-5160
From: Alexandria |
| photo-closeup-sphinx-alexandria-egypt-image-5155
From: Alexandria |
| | photo-sphinx-alexandria-egypt-5134
From: Alexandria |
|
|
| 
| | 
| | 
| | 
| | 
| | 
| |
photo-street-scene-alexandria-egypt-photo-5129
From: Alexandria |
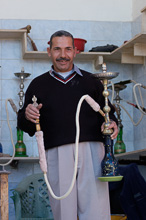
| photo-man-holding-hookah-smoking-water-pipes-image-5123
From: Alexandria |
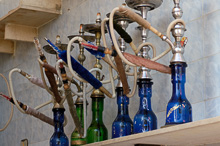
| hookah-smoking-water-pipes-for-sale-5120
From: Alexandria |
| goup-of-women-alexandra-egypt-5115
From: Alexandria |
| photo-qaitbay-citadel-fort-alexandria-egypt-image-1532
From: Alexandria |
| photo-qaitbay-citadel-fort-alexandria-egypt-image-1519
From: Alexandria |
|
|
| 
| | 
| | 
| | 
| | 
| | 
| |
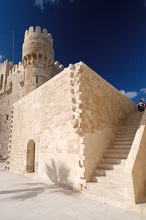
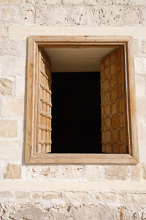
photo-window-qaitbay-citadel-fort-alexandria-egypt-image-1515
From: Alexandria |
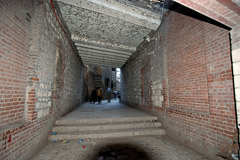
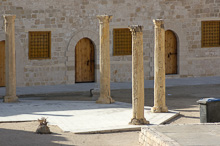
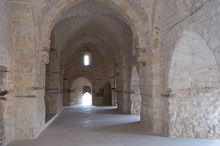
| interior-corridoor-qaitbay-citadel-fort-alexandria-egypt-image-1502
From: Alexandria |
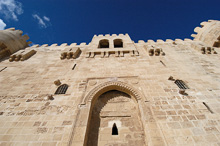
| photo-qaitbay-citadel-fort-alexandria-egypt-image-1486
From: Alexandria |
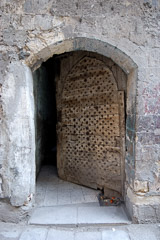
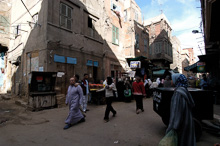
| old-neighborhood-alexandria-egypt-photo-1462
From: Alexandria |
| old-neighborhood-alexandria-egypt-photo-1460
From: Alexandria |
| old-neighborhood-alexandria-egypt-photo-1458
From: Alexandria |
|
|
| 
| | 
| | 
| | 
| | 
| | 
| |
old-neighborhood-alexandria-egypt-photo-1455
From: Alexandria |
| old-neighborhood-alexandria-egypt-photo-1448
From: Alexandria |
| street-scene-alexandria-egypt-1444
From: Alexandria |
| photo-sphinx-alexandria-egypt-image-1422
From: Alexandria |
| photo-sphinx-alexandria-egypt-image-1421
From: Alexandria |
| photo-spinx-at-pomeys-pillar-in-alexandria,-egypt-12-04-1420-e
From: Alexandria |
|
|
| 
| | 
| | 
| | 
| | 
| | 
| |
photo-pompeys-pillar-and-sphinx-alexandria-egypt-image-1416
From: Alexandria |
| photo-pompeys-pillar-and-sphinx-alexandria-egypt-image-1401a
From: Alexandria |
| photo-pompeys-pillar-and-sphinx-alexandria-egypt-image-1400a
From: Alexandria |
| photo-pompeys-pillar-and-sphinx-alexandria-egypt-image-1389a
From: Alexandria |
| street-scene-alexandria-egypt-1385a
From: Alexandria |
| street-scene-alexandria-egypt-1383a
From: Alexandria |
|
|
| 
| | 
| | 
| | 
| | 
| | 
| |
| | | ancient-egyptian-pharoh-holding-scepter-illustration-097a
From: Daily Life |
| | catacombs-in-alexandra-exypt-illustration-history-pi007a
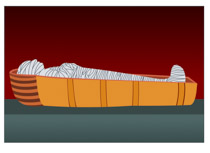
From: Mummies |
|
|
| 
| | 
| | 
| | 
| | 
| | 
| |
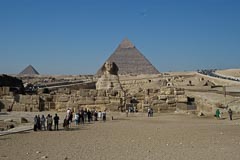
| | | | historical-illustration-of-the-sphinx-with-the-pyramid-in-the-backround-egypt-151a
From: Pyramids and Temples |
| limestone-stones-from-the-tourah-quarry-egypt_142a
From: Illustrations |
|
|
| 
| | 
| | 
| | 
| | 
| | 
| |
| | | | | |
|
| 
| | 
| | 
| | 
| | 
| | 
| |
| | | | | |
|
| 
| | 
| | 
| | 
| | 
| | 
| |
| | | | | |
|
| 
| | 
| | 
| | 
| | 
| | 
| |
| | | | | |
|
| 
| | 
| | 
| | 
| | 
| | 
| |
| | | | | |
|
| 
| | 
| | 
| | 
| | 
| | 
| |
| | | | | |
|
| 
| | 
| | 
| | 
| | 
| | 
| |
| | | | | |
|
| 
| | 
| | 
| | 
| | 
| | 
| |
| | | | | |
|
| 
| | 
| | 
| | 
| | 
| | 
| |
| | | | | |
|
| 
| | 
| | 
| | 
| | 
| | 
| |
| | | | | |
|
| 
| | 
| | 
| | 
| | 
| | 
| |
| | | | | |
|
| 
| | 
| | 
| | 
| | 
| | 
| |
| | | | | |
|
| 
| | 
| | 
| | 
| | 
| | 
| |
| | | | | |
|
| 
| | 
| | 
| | 
| | 
| | 
| |
| | | | | |
|
| 
| | 
| | 
| | 
| | 
| | 
| |
| | | | | |
|
| 
| | 
| | 
| | 
| | 
| | 
| |
| | | | | |
|
| 
| | 
| | 
| | 
| | 
| | 
| |
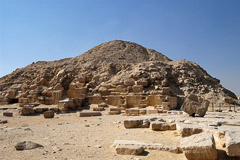
| | | unas-pyramid-saqqara-complex-photo-image-1323
From: Sakkara |
| unas-pyramid-saqqara-complex-photo-image-1318
From: Sakkara |
| tomb-bas-relief-hieroglyphs-sakkara-photo-image-1191
From: Sakkara |
|
|
| 
| | 
| | 
| | 
| | 
| | 
| |
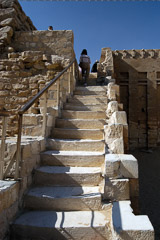
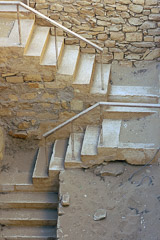
stairs-to-step-pyramid-egypt-image-1298
From: Sakkara |
| snake-wall-sakkara-step-pyramid-photo-image-1299
From: Sakkara |
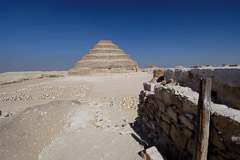
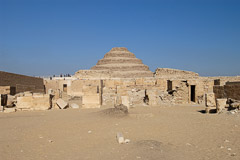
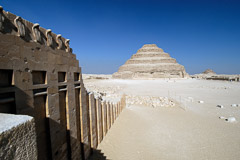
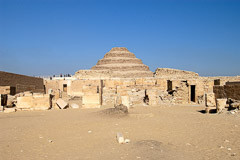
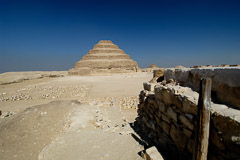
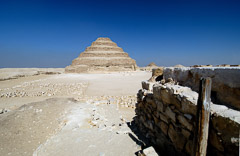
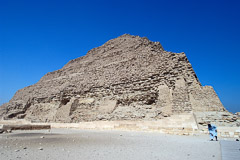
| sakkara-step-pyramids-built-for-king-djoser-photo-image-1301
From: Sakkara |
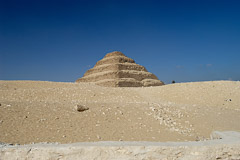
| sakkara-step-pyramids-built-for-king-djoser-photo-image-5007
From: Sakkara |
| sakkara-step-pyramids-built-for-king-djoser-photo-image-1217
From: Sakkara |
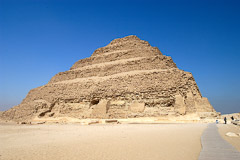
| sakkara-step-pyramid-complex-built-for-king-djoser-photo-image-1313
From: Sakkara |
|
|
| 
| | 
| | 
| | 
| | 
| | 
| |
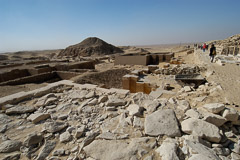
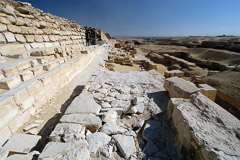
ruins-walls-view-step-pyramids-at-sakkara-photo-image-1338
From: Sakkara |
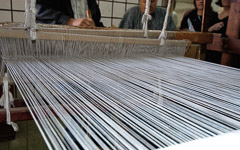
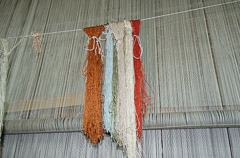
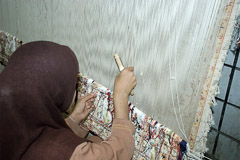
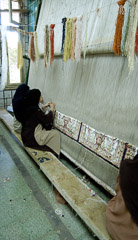
| hand-made-carpet-factory-egypt-photo-image-1366a
From: Sakkara |
| hand-made-carpet-factory-egypt-photo-image-1375a
From: Sakkara |
| hand-made-carpet-factory-egypt-photo-image-1363a
From: Sakkara |
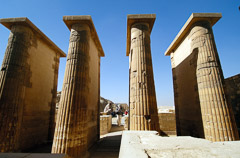
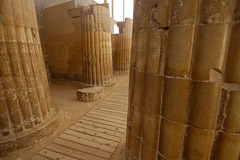
| columns-sakkara-funerary-complex-of-djoser-photo-image-1255a
From: Sakkara |
| sakkara-step-pyramid-complex-built-for-king-djoser-photo-image-1310a
From: Sakkara |
|
|
| 
| | 
| | 
| | 
| | 
| | 
| |
snake-wall-sakkara-step-pyramid-photo-image-1299a
From: Sakkara |
| stairs-to-step-pyramid-egypt-image-1296a
From: Sakkara |
| two-egyptian-woman-baking-breat-outdoor-oven-5053-photo-image
From: Sakkara |
| stone-stairs-at-pyramid-of-djoser-4995
From: Sakkara |
| egyptain-guard-sitting-on-camel-photo-image-4937
From: Sakkara |
| egyptain-guard-sitting-on-camel-photo-image-4938
From: Sakkara |
|
|
| 
| | 
| | 
| | 
| | 
| | 
| |
| step-pyramids-at-sakkara-photo-image-5008
From: Sakkara |
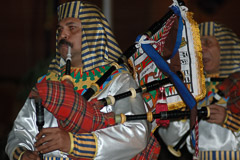
| egyptian-man-playing-tamborine-photo-image-5068
From: Sakkara |
| egyptian-man-playing-tamborine-photo-image-5071
From: Sakkara |
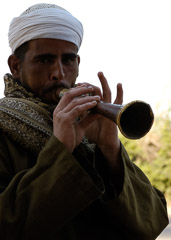
| egyptian-man-playing-horn-photo-image-5060
From: Sakkara |
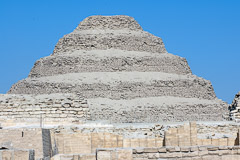
| closeup-step-pyramids-at-sakkara-photo-image-4993
From: Sakkara |
|
|
| 
| | 
| | 
| | 
| | 
| | 
| |
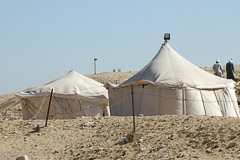
tents-setup-in-the-egyptian-desert-photo-image-5004
From: Sakkara |
| closeup-step-pyramids-at-sakkara-photo-image-4991
From: Sakkara |
| sakkara-step-pyramids-built-for-king-djoser-photo-image4991a
From: Sakkara |
| egyptain-guard-sitting-on-camel-photo-image-4937b
From: Sakkara |
| sakkara-step-pyramids-built-for-king-djoser-photo-image4979a
From: Sakkara |
| egyptain-guard-sitting-on-camel-photo-image-4937a
From: Sakkara |
|
|
| 
| | 
| | 
| | 
| | 
| | 
| |
tourist-sovenirs-for-sale-near-memphis-egypt-photo-image-4894
From: Sakkara |
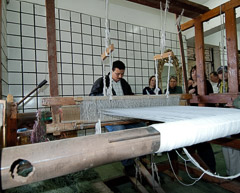
| woman-at-carpet-factory-egypt-photo-image-1364a
From: Sakkara |
| hand-made-carpet-factory-egypt-photo-image-1361a
From: Sakkara |
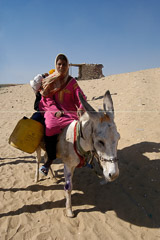
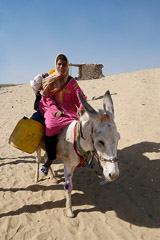
| egyptian-girl-sitting-on-donkey-photo-image-1357a
From: Sakkara |
| egyptian-girl-sitting-on-donkey-photo-image-1357b
From: Sakkara |
| ruins-walls-view-step-pyramids-at-sakkara-phot-image-1334
From: Sakkara |
|
|
| 
| | 
| | 
| | 
| | 
| | 
| |
ruins-walls-view-step-pyramids-at-sakkara-phot-image-1334a
From: Sakkara |
| ruins-walls-view-step-pyramids-at-sakkara-phot-image-1338a
From: Sakkara |
| unas-pyramid-saqqara-complex-photo-image-1323a
From: Sakkara |
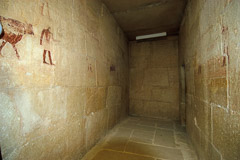
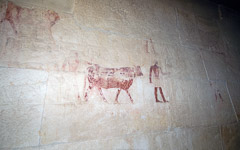
| paintings-inside-tomb-step-pyramid-photo-image-1316
From: Sakkara |
| unas-pyramid-saqqara-complex-photo-image-1318a
From: Sakkara |
| paintings-inside-tomb-step-pyramid-photo-image-1316a
From: Sakkara |
|
|
| 
| | 
| | 
| | 
| | 
| | 
| |
paintings-inside-tomb-step-pyramid-photo-image-1315a
From: Sakkara |
| paintings-inside-tomb-step-pyramid-photo-image-1314
From: Sakkara |
| paintings-inside-tomb-step-pyramid-photo-image-1315
From: Sakkara |
| sakkara-step-pyramid-complex-built-for-king-djoser-photo-image-1313a
From: Sakkara |
| paintings-inside-tomb-step-pyramid-photo-image-1314a
From: Sakkara |
| sakkara-step-pyramids-built-for-king-djoser-photo-image-1301a
From: Sakkara |
|
|
| 
| | 
| | 
| | 
| | 
| | 
| |
sakkara-step-pyramids-built-for-king-djoser-photo-image-1301b
From: Sakkara |
| corner-sakkara-step-pyramid-photo-image-1292a
From: Sakkara |
| snake-wall-sakkara-step-pyramid-photo-image-1298a
From: Sakkara |
| corner-sakkara-step-pyramid-photo-image-1289a
From: Sakkara |
| corner-sakkara-step-pyramid-photo-image-1291a
From: Sakkara |
| corner-sakkara-step-pyramid-photo-image-1283a
From: Sakkara |
|
|
| 
| | 
| | 
| | 
| | 
| | 
| |
corner-sakkara-step-pyramid-photo-image-1280a
From: Sakkara |
| corner-sakkara-step-pyramid-photo-image-1281a
From: Sakkara |
| sakkara-step-pyramids-built-for-king-djoser-photo-image-1279a
From: Sakkara |
| sakkara-funerary-complex-of-djoser-photo-image-1275
From: Sakkara |
| sakkara-step-pyramids-built-for-king-djoser-photo-image-1276a
From: Sakkara |
| sakkara-step-pyramids-built-for-king-djoser-photo-image-1278a
From: Sakkara |
|
|
| 
| | 
| | 
| | 
| | 
| | 
| |
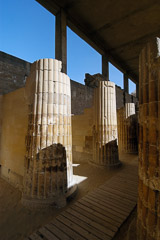
columns-sakkara-funerary-complex-of-djoser-photo-image-1259a
From: Sakkara |
| sakkara-step-pyramids-built-for-king-djoser-photo-image-1270a-edit
From: Sakkara |
| sakkara-step-pyramids-built-for-king-djoser-photo-image-1270a
From: Sakkara |
| columns-sakkara-funerary-complex-of-djoser-photo-image-1232
From: Sakkara |
| columns-sakkara-funerary-complex-of-djoser-photo-image-1245a
From: Sakkara |
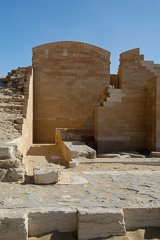
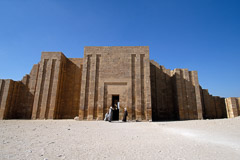
| entrance-to-djosers-step-pyramdi-complex-photo-image-1220a
From: Sakkara |
|
|
| 
| | 
| | 
| | 
| | 
| | 
| |
closeup-of-camel-egyptain-desert-photo-image-1208a-edit
From: Sakkara |
| closeup-of-camel-egyptain-desert-photo-image-1208a
From: Sakkara |
| closeup-of-camel-egyptain-desert-photo-image-1208e
From: Sakkara |
| egyptain-guard-sitting-on-camel-photo-image-1206a
From: Sakkara |
| tomb-bas-relief-hieroglyphs-sakkara-photo-image-1192a
From: Sakkara |
| tomb-bas-relief-hieroglyphs-sakkara-photo-image-1180a
From: Sakkara |
|
|
| 
| | 
| | 
| | 
| | 
| | 
| |
tomb-bas-relief-hieroglyphs-sakkara-photo-image-1186
From: Sakkara |
| tomb-bas-relief-hieroglyphs-sakkara-photo-image-1189a
From: Sakkara |
| door-tomb-sakkara-step-pyramid-complex-photo-image-1174a
From: Sakkara |
| door-tomb-sakkara-step-pyramid-complex-photo-image-1178a
From: Sakkara |
| tomb-bas-relief-hieroglyphs-sakkara-photo-image-1179a
From: Sakkara |
| wall-carvinbs-saqqara-ancient-egypt-photo-image-1168
From: Sakkara |
|
|
| 
| | 
| | 
| | 
| | 
| | 
| |
desert-sands-near-step-pyramid-photo-image-1160
From: Sakkara |
| tourist-walking-into-tomb-near-memphis-egypt-1158a
From: Sakkara |
| egyptain-guard-sitting-on-camel-photo-image-1135a
From: Sakkara |
| egyptain-guard-sitting-on-camel-photo-image-1136a
From: Sakkara |
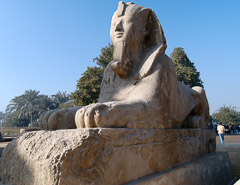
| alabaster-sphinx-memphis-egypt-image-1097a
From: Sakkara |
| alabaster-sphinx-memphis-egypt-image-1101a
From: Sakkara |
|
|
| 
| | 
| | 
| | 
| | 
| | 
| |
colored-sands-of-the-egyptian-desert-photo-3650
From: Abusimbel |
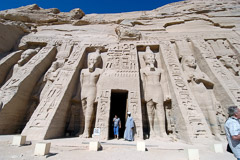
| small-temple-in-abu-simbel-aswan-egypt-photo-image-3612
From: Abusimbel |
| small-temple-in-abu-simbel-aswan-egypt-photo-image-3623
From: Abusimbel |
| small-temple-in-abu-simbel-aswan-egypt-photo-image-3629
From: Abusimbel |
| aerial-view-abu-simbel-aswan-egypt-photo-image-6858
From: Abusimbel |
| aerial-view-abu-simbel-aswan-egypt-photo-image-6864
From: Abusimbel |
|
|
| 
| | 
| | 
| | 
| | 
| | 
| |
rameses-ii-temple-in-abu-simbel-aswan-egypt-photo-image-6841
From: Abusimbel |
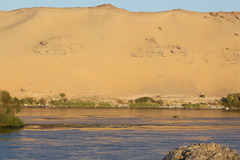
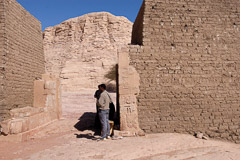
| area-around-abu-simbel-nubia-egypt-photo-6836-2
From: Abusimbel |
| area-around-abu-simbel-nubia-egypt-photo-6836
From: Abusimbel |
| rameses-ii-temple-in-abu-simbel-aswan-egypt-photo-image-6839b
From: Abusimbel |
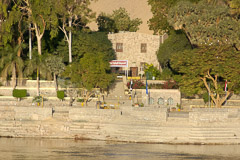
| area-around-abu-simbel-nubia-egypt-photo-6823
From: Abusimbel |
| area-around-abu-simbel-nubia-egypt-photo-6829
From: Abusimbel |
|
|
| 
| | 
| | 
| | 
| | 
| | 
| |
area-around-abu-simbel-nubia-egypt-photo-6833
From: Abusimbel |
| rameses-ii-temple-in-abu-simbel-aswan-egypt-photo-image-6814
From: Abusimbel |
| close-up-of-statue-great-temple-abu-simbel-egypt-photo-image-6808
From: Abusimbel |
| close-up-of-statue-great-temple-abu-simbel-egypt-photo-image-6811
From: Abusimbel |
| aerial-view-abu-simbel-aswan-egypt-photo-image-6794
From: Abusimbel |
| close-up-of-statue-great-temple-abu-simbel-egypt-photo-image-6807
From: Abusimbel |
|
|
| 
| | 
| | 
| | 
| | 
| | 
| |
| | | colored-sands-of-the-egyptian-desert-photo-3651
From: Abusimbel |
| rameses-ii-temple-in-abu-simbel-aswan-egypt-photo-image-3638
From: Abusimbel |
| rameses-ii-temple-in-abu-simbel-aswan-egypt-photo-image-3639
From: Abusimbel |
|
|
| 
| | 
| | 
| | 
| | 
| | 
| |
rameses-ii-temple-in-abu-simbel-aswan-egypt-photo-image-3634
From: Abusimbel |
| rameses-ii-temple-in-abu-simbel-aswan-egypt-photo-image-3637
From: Abusimbel |
| area-around-abu-simbel-nubia-egypt-photo-3606
From: Abusimbel |
| small-temple-in-abu-simbel-aswan-egypt-photo-image-3630
From: Abusimbel |
| small-temple-in-abu-simbel-aswan-egypt-photo-image-3632
From: Abusimbel |
| small-temple-in-abu-simbel-aswan-egypt-photo-image-3599
From: Abusimbel |
|
|
| 
| | 
| | 
| | 
| | 
| | 
| |
small-temple-in-abu-simbel-aswan-egypt-photo-image-3600
From: Abusimbel |
| small-temple-in-abu-simbel-aswan-egypt-photo-image-3602
From: Abusimbel |
| small-temple-in-abu-simbel-aswan-egypt-photo-image-3583
From: Abusimbel |
| small-temple-in-abu-simbel-aswan-egypt-photo-image-3589
From: Abusimbel |
| small-temple-in-abu-simbel-aswan-egypt-photo-image-3590
From: Abusimbel |
| area-around-abu-simbel-nubia-egypt-photo-3571
From: Abusimbel |
|
|
| 
| | 
| | 
| | 
| | 
| | 
| |
small-temple-in-abu-simbel-aswan-egypt-photo-image-3577
From: Abusimbel |
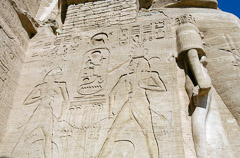
| statue-in-the-great-temple-at-abu-simbel-nubia-egypt-photo-3557
From: Abusimbel |
| hierglyphs-in-great-temple-abu-simbel-egypt-photo-image-3552b
From: Abusimbel |
| hierglyphs-in-great-temple-abu-simbel-egypt-photo-image-3553
From: Abusimbel |
| statue-in-the-great-temple-at-abu-simbel-nubia-egypt-photo-3555
From: Abusimbel |
| hierglyphs-in-great-temple-abu-simbel-egypt-photo-image-3545
From: Abusimbel |
|
|
| 
| | 
| | 
| | 
| | 
| | 
| |
hierglyphs-in-great-temple-abu-simbel-egypt-photo-image-3552
From: Abusimbel |
| rameses-ii-temple-in-abu-simbel-aswan-egypt-photo-image-3543
From: Abusimbel |
| rameses-ii-temple-in-abu-simbel-aswan-egypt-photo-image-3513-2
From: Abusimbel |
| rameses-ii-temple-in-abu-simbel-aswan-egypt-photo-image-3513
From: Abusimbel |
| rameses-ii-temple-in-abu-simbel-aswan-egypt-photo-image-3525
From: Abusimbel |
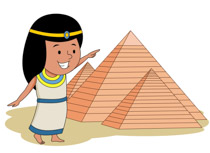
| young-ancient-egyptian-girl-pointing-towards-pyramids-at-giza-clipart
From: Ancient Egypt |
|
|
| 
| | 
| | 
| | 
| | 
| | 
| |
young-ancient-egyptian-boy-pointing-towards-pyramids-at-giza-clipart
From: Ancient Egypt |
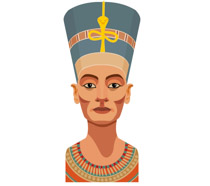
| nefertiti-egyptian-queen-ancient-egypt-clipart-22G
From: Ancient Egypt |
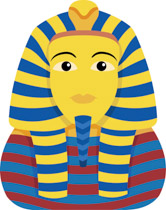
| mask-of-ancient-egyptian-king-tutankhamun-clipart-22G
From: Ancient Egypt |
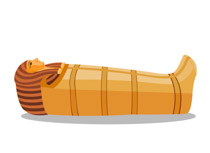
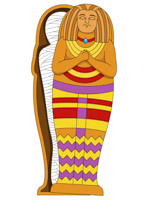
| ancient-egyptian-mummy-coffin-of-pharaoh-clipart
From: Ancient Egypt |
| ancient-egyptian-king-tutankhamun-standing-clipart
From: Ancient Egypt |
| |
|
| 
| | 
| | 
| | 
| | 
| | 
| |
| | | | | |
|
| 
| | 
| | 
| | 
| | 
| | 
| |
| | | | | |
|
| 
| | 
| | 
| | 
| | 
| | 
| |
| | | | | |
|


